Showing posts with label DIY. Show all posts

Sunday, July 24, 2011

From this, to this...

So in June, at the end of the school year, I received a 25$ gift card at Chapters from one of my student...Perfect gift for a bookworm like me. I finally decided to go to the book store on Thursday, and bought myself this sweet little jewel.

***

Alors en Juin, à la fin de l'année scolaire, j'ai reçu une carte-cadeau de 25 $ chez Chapters de la part d'un de mes éléves ... Le cadeau idéal pour un rat de bibliothèque comme moi. Je me suis finalement décidée d'aller à la librairie ce jeudi, et me suis acheté ce petit bijou.

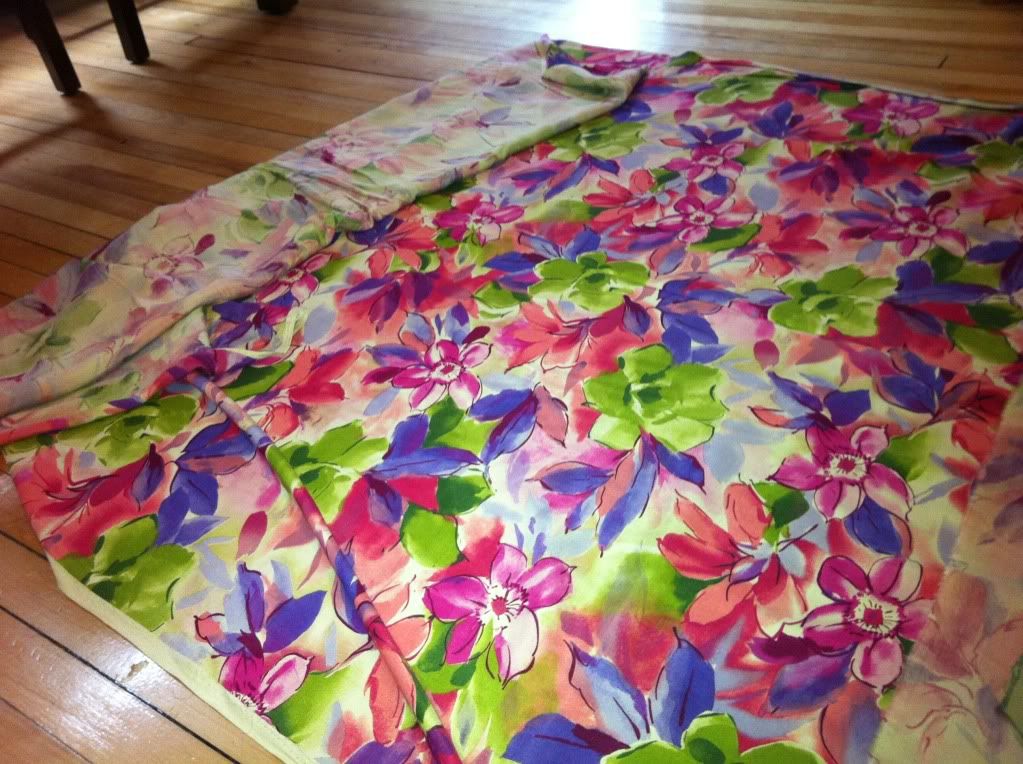
 This book, that comes with 15 different patterns, is perfect for anyone who feels like whipping up a piece of clothing in an hour or two. By Friday, I was already itching to make my own dress. So I went to Fabricville (Hello HUGE sale! Buy a yard, get 2 free!) and I come home with a lighter wallet, but a heavy bag of fabric. For my first creation, I decided to go with a bright and bold flowery pattern.

***
Ce livre, qui vient avec quinze modèles différents, est parfait pour tous ceux qui veulent créer une pièce de vêtement en une heure ou deux. Par vendredi, j'étais déjà impatiente de faire ma propre robe. Je suis donc allée à Fabricville (Bonjour vente ÉNORME! Acheter un mètre, obtenez-en 2 gratuits!) et je reviens chez-moi le porte-monnaie léger, mais avec un lourd sac de tissu. Pour ma première création, j'ai décidée d'aller avec un motif floral éblouissant.

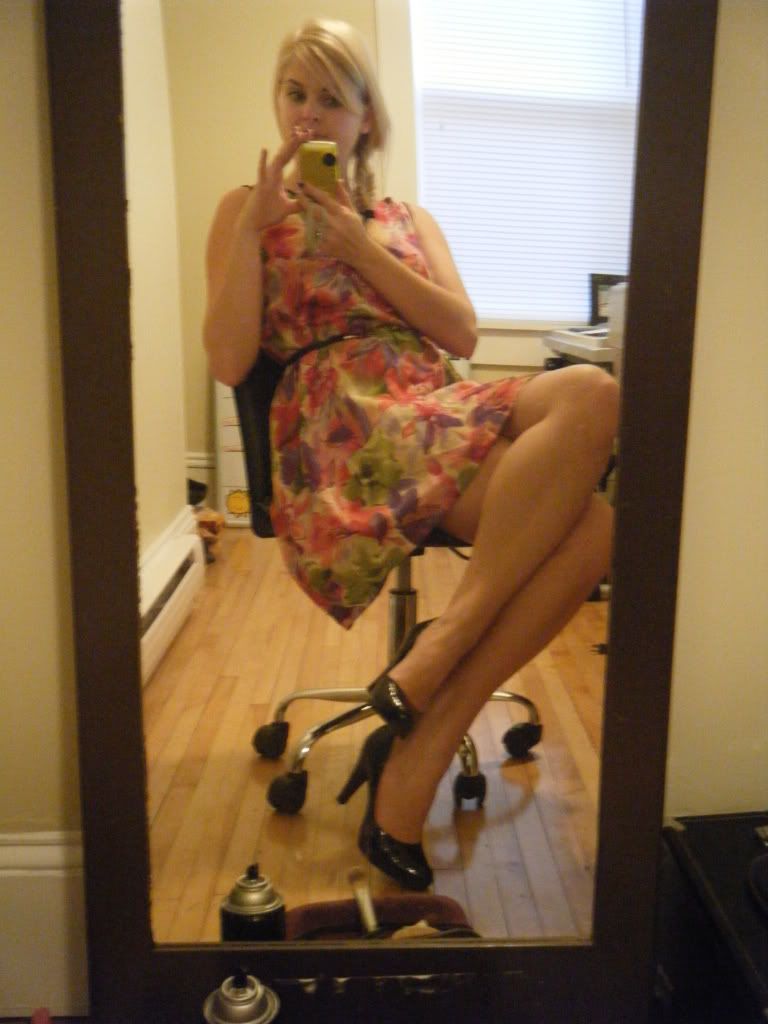
After a tricky start (my sewing machine wasn't working, so I had to borrow my sister-in-law's) and a trip around town looking for some sewing machine needles (the needle broke on the first pin), I was ready to go. I only had a limited time left, since I had to pick up Loverboy from his first day at work, after which we were heading over at some friends and I, of course, wanted to wear my dress. So after about an hour and a half of work, here is the final product.
Oh! and thos lovely black beauties on my feet are my brand (second hand) new pumps that I got for 4$ at a second hand store! Gotta love thrift shopping!
***

Après un début assez mouvementé (ma machine à coudre ne fonctionnait pas, donc j'ai dû emprunter celle de ma belle-sœur) et un voyage autour de la ville à la recherche d'aiguilles pour machine à coudre (l'aiguille se brisa sur la première broche), j'étais prêt à commencer. Mon temps était limité puisque je devais aller chercher Loverboy à son premier jour au travail, après quoi nous devions aller chez des amis et je voulais, bien sûr, porter ma robe. Après environ une heure et demi de travail, voici le produit final.

Oh! et ces beautés noires sur mes pieds sont mes nouveaux souliers que j'ai trouvé pour 4$ dans un magasin d'occasion! Vive le "thrift shopping"!


Yours truly, Bien à vous,

Monday, February 28, 2011

DIY : Safety Pin earrings


I saw a pair of earrings, quite a long time ago, on ShopRuche, and I thought they were so cute, I simply had to either buy them, or make them. Since then, I haven't been able to find them on ShopRuche again, but I've found these instead. They are different from the ones I'm making since they have two safety pins per earrings instead of one, but you can do whatever you want...Put in three if you feel like it.
***
J'ai vu une paire de pendants d'oreilles  il y a très longtemps, sur le site de ShopRuche, et je les aimais tellement qu'il fallait absolument que soit je les achète, soit je les fasse. Depuis, je n'ai pas pu les retrouver sur le site de ShopRuche, mais j'ai trouvé ceux-ci au lieu. Ils sont un peu différents des miens puisqu'ils ont deux épingles de sûreté au lieu d'une, mais vous pouvez faire ce que vous voulez...ajoutez-en trois si vous le voulez.


What you'll need / Ce dont vous aurez besoin:
  • Beads (color of your choice) / Billes (couleur de votre choix)
  • Safety pins / Épingles de sûreté
  • 2 ear wires / 2 pendants d'oreilles
  • A pair of pliers / Un outil pour plier
  • Don't worry about the little rings in the photo / Ne vous occupez pas des petites rondelles dans la photo

What to do / Ce qu'il faut faire:

1)  Do this with the beads. You can put in as many as you like.
***
Faites ceci avec les billes. Vous pouvez en placer autant que vous voulez.


2) Close the safety pins. You should have something that looks like this.
***
Fermez les épingles de sûreté. Vous devriez avoir quelque chose qui ressemble à ceci.


3)  Open the loop at the bottom of the ear wires. Simply  make it wide enough to pass the loop of the safety pin through. Close it again.
***
Ouvrez la boucle au bas des pendants d'oreilles. Ouvrez-les simplement grand assez pour laisser passer la boucle de l'épingle de sûreté. Fermez-les à nouveau.

ET VOILÀ!

Yours truly, Bien à vous,
Martine

Sunday, February 13, 2011

DIY : Pearl headband


What you'll need / Ce dont vous aurez besoin:
  • cheap pearl necklace / Collier de perles peu dispendieux
  • headband / Serre-tête
  • Glue-gun and glue / fusil à colle chaude et colle
  • thread / fil

What to do / Ce qu'il faut faire:
 1) Cut the necklace so that it is the same length as the headband. Be sure to knot the ends, so that the pearls don't fall.
***
     Coupez le collier afin qu'il soit la même longueur que le serre-tête. Assurez-vous de faire des nœuds à chaque bouts afin d'éviter que les perles s'échappent.


2) Glue one of the ends of the necklace to one end of the headband.
***
    Collez l'un des bouts du collier à l'un des bouts du serre-tête.


3) Wrap the thread tightly around the headband and each pearls to secure it to the headband.
***
    Entourez le fil autour de chaque perle et du serre-tête. Bien serrer!


4) Glue the other end of the necklace to the other end of the headband and voilà!
***
    Collez l'autre bout du collier à l'autre bout du serre-tête, et voilà!


5) You could also glue some ribbon around the ends of the headband, so that it feels softer on the head.  
***
    Vous pourriez aussi coller un ruban autour de chaque bouts du serre-tête, afin d'éviter qu'il serre trop la tête.


Yours truly, Bien à vous,
Martine